Foxed
- the clayhouse
- Sep 27, 2019
- 1 min read
We have a fox that visits the Clayhouse garden regularly. We don't see it often but there's a clear track through the garden where it travels through. I was inspired to make a fox and here it is.
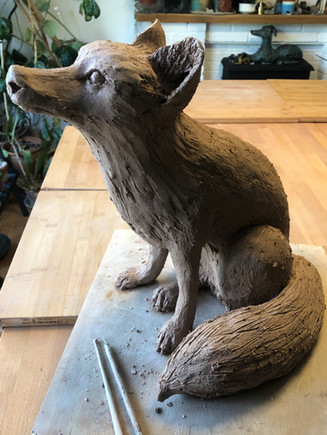
1. The first picture is of the model after I'd finished the initial modelling. At this stage it is partially hollow but has newspaper inside which I used to get the shape.
2. The second picture is the tail cut before I pulled the newspaper out. You can see it's quite thick walled at this point and needed to be hollowed out quite a bit.
3. Picture three shows the tail with register marks drawn on. This is important to do before cutting so that you can line it up properly when you put it back together.
4. I decided to make two cuts one round the middle and another round the neck. I find a wire is the easiest way to cut it.
5. I laid the upper body carefully on a padded mat so that it wouldn't distort.
6/7. I pulled all the paper out and you can see that it's possible to make the walls quite thin.
8. I lined up the body and scored and slipped the edges to join it back together.
9. Next I cut the head off at the neck. This bit was the most solid and needed lots of clay scraping out before scoring, slipping and 10. joining again.
11. The final picture shows the finished fox drying out on the studio shelves.


Comments